Step 1: Locate
Review the Processor & Sensor Overview.
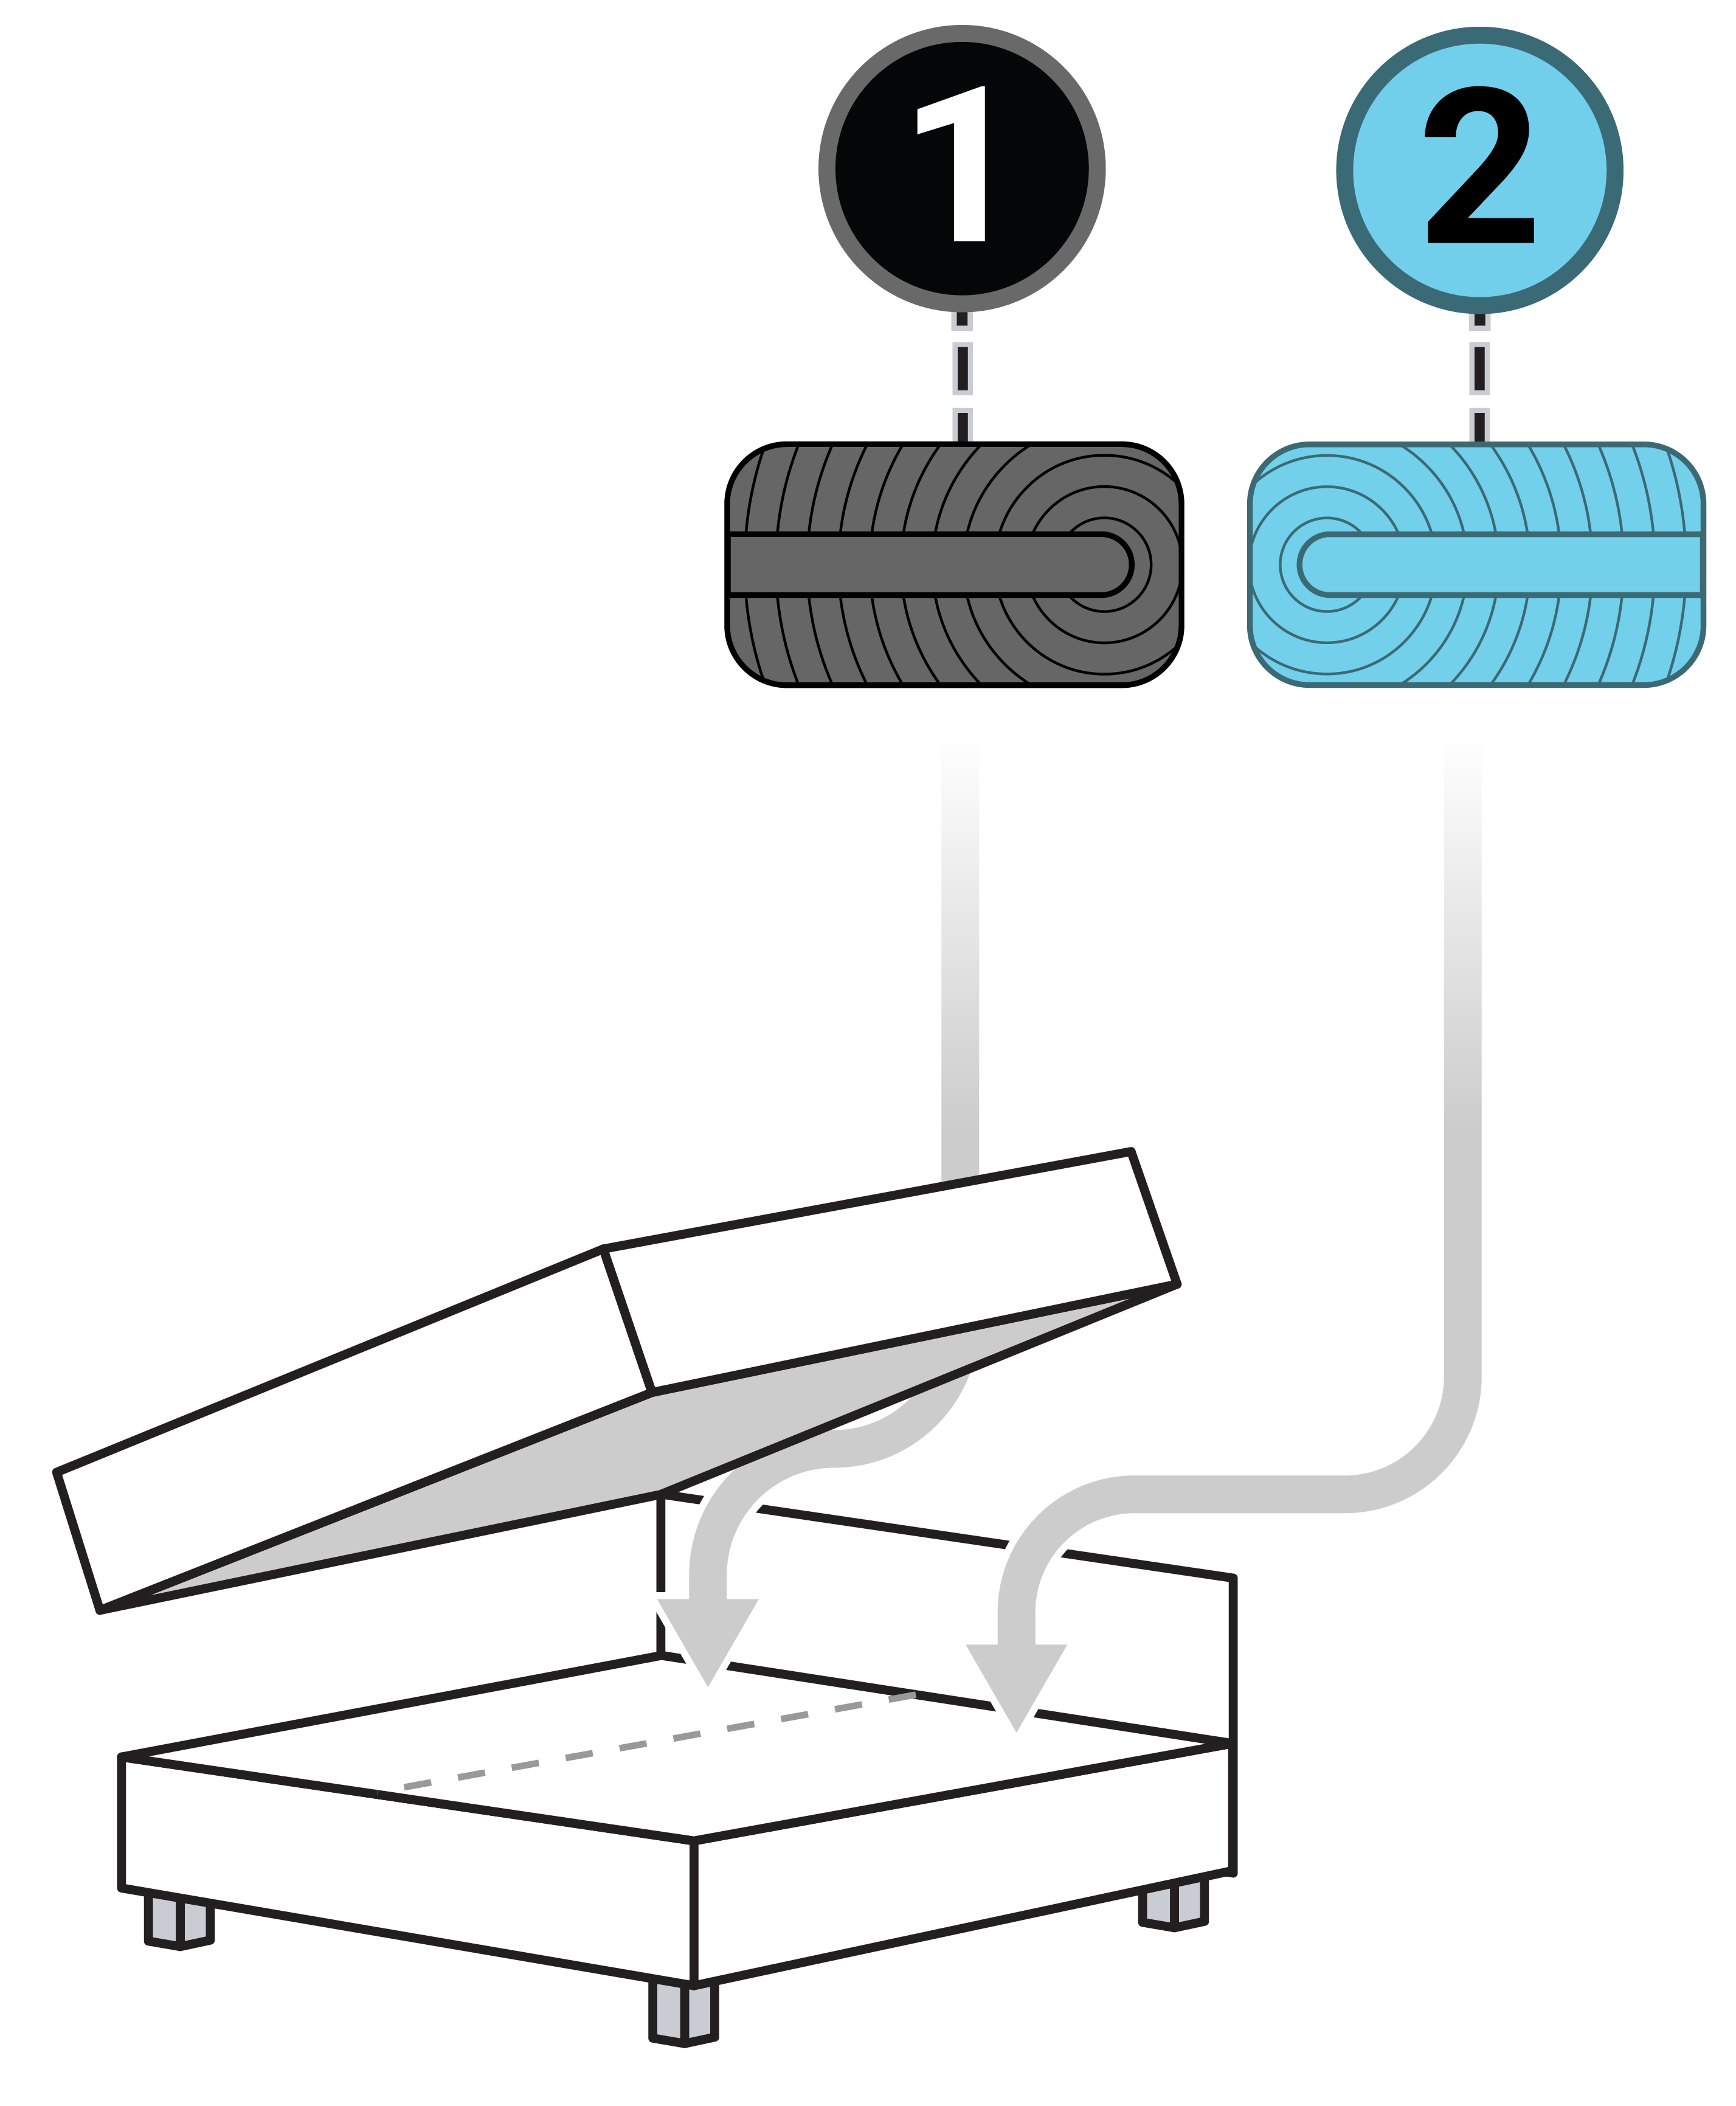
Your sensors should be located underneath the mattress below the pillow area, on top of the base. To make the sensor area easier to access, it may help to slide the mattress down a bit towards the foot of the bed.

Step 2: Remove & Unplug
Remove the sensor that you will be replacing from under the mattress, and unplug the sensor plug from the processor.

Step 3: Install
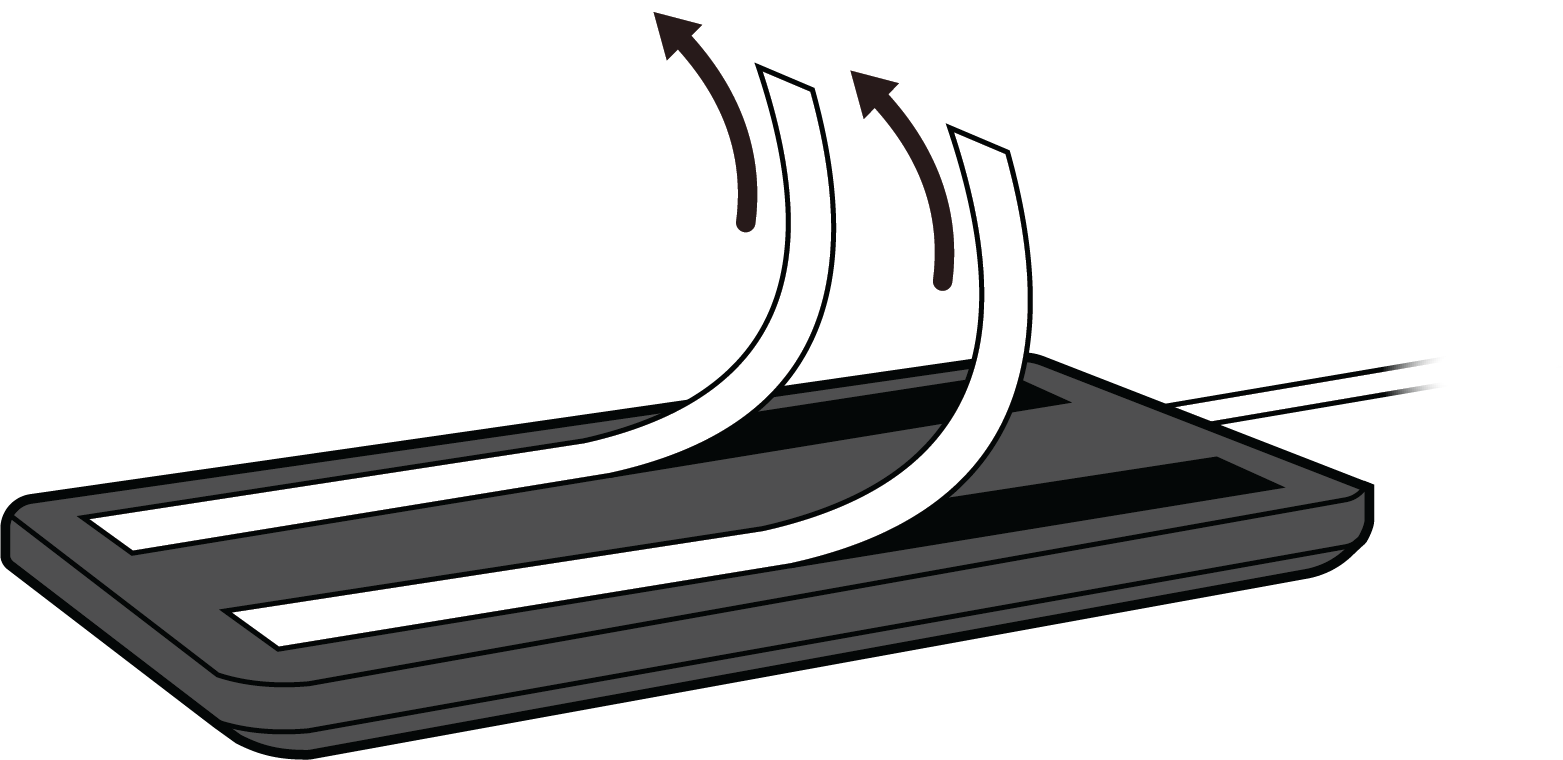
Remove the film covering the adhesive on the bottom of the new sensor.

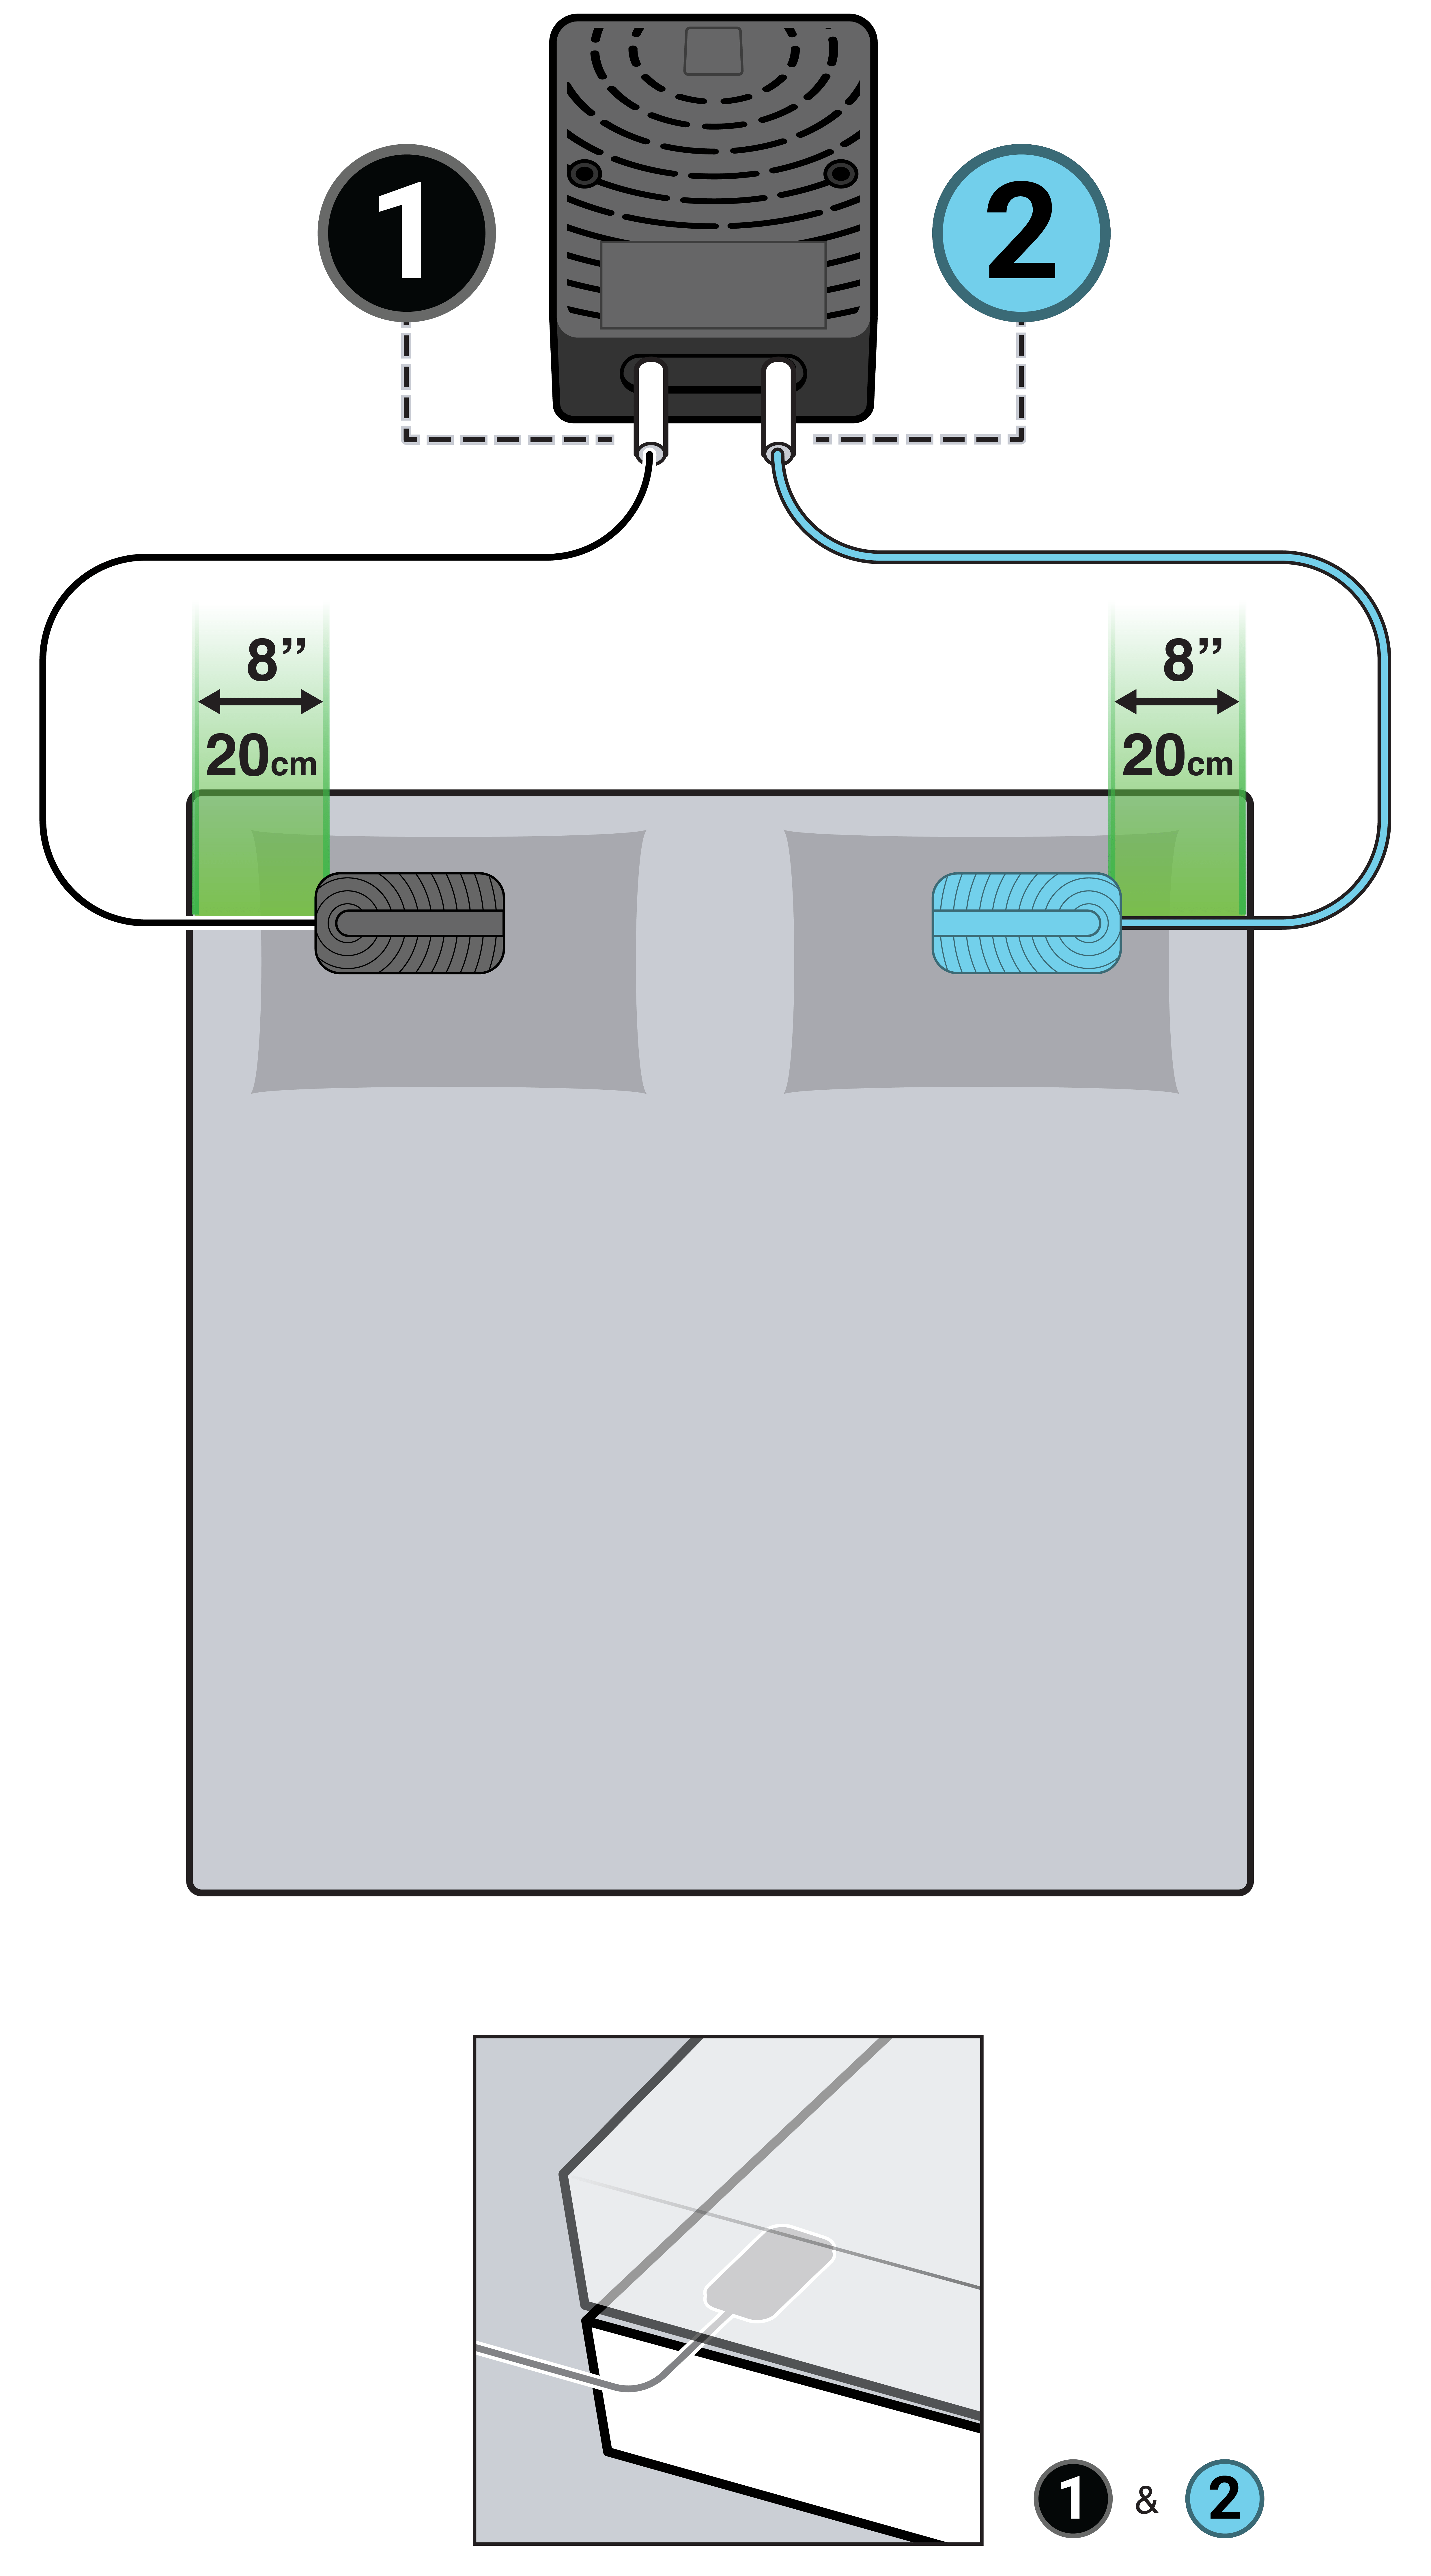
The sensors should be placed on a firm and flat surface underneath your mattress, on top of the base. Place the sensors eight inches from the edges of the base, as depicted below. Press down evenly and firmly over the sensor pad to secure it in place.

Note: the processor should not be placed under the mattress, instead the processor can rest on the floor or on a nightstand.
Step 4: Plug In
If you have just one sensor:
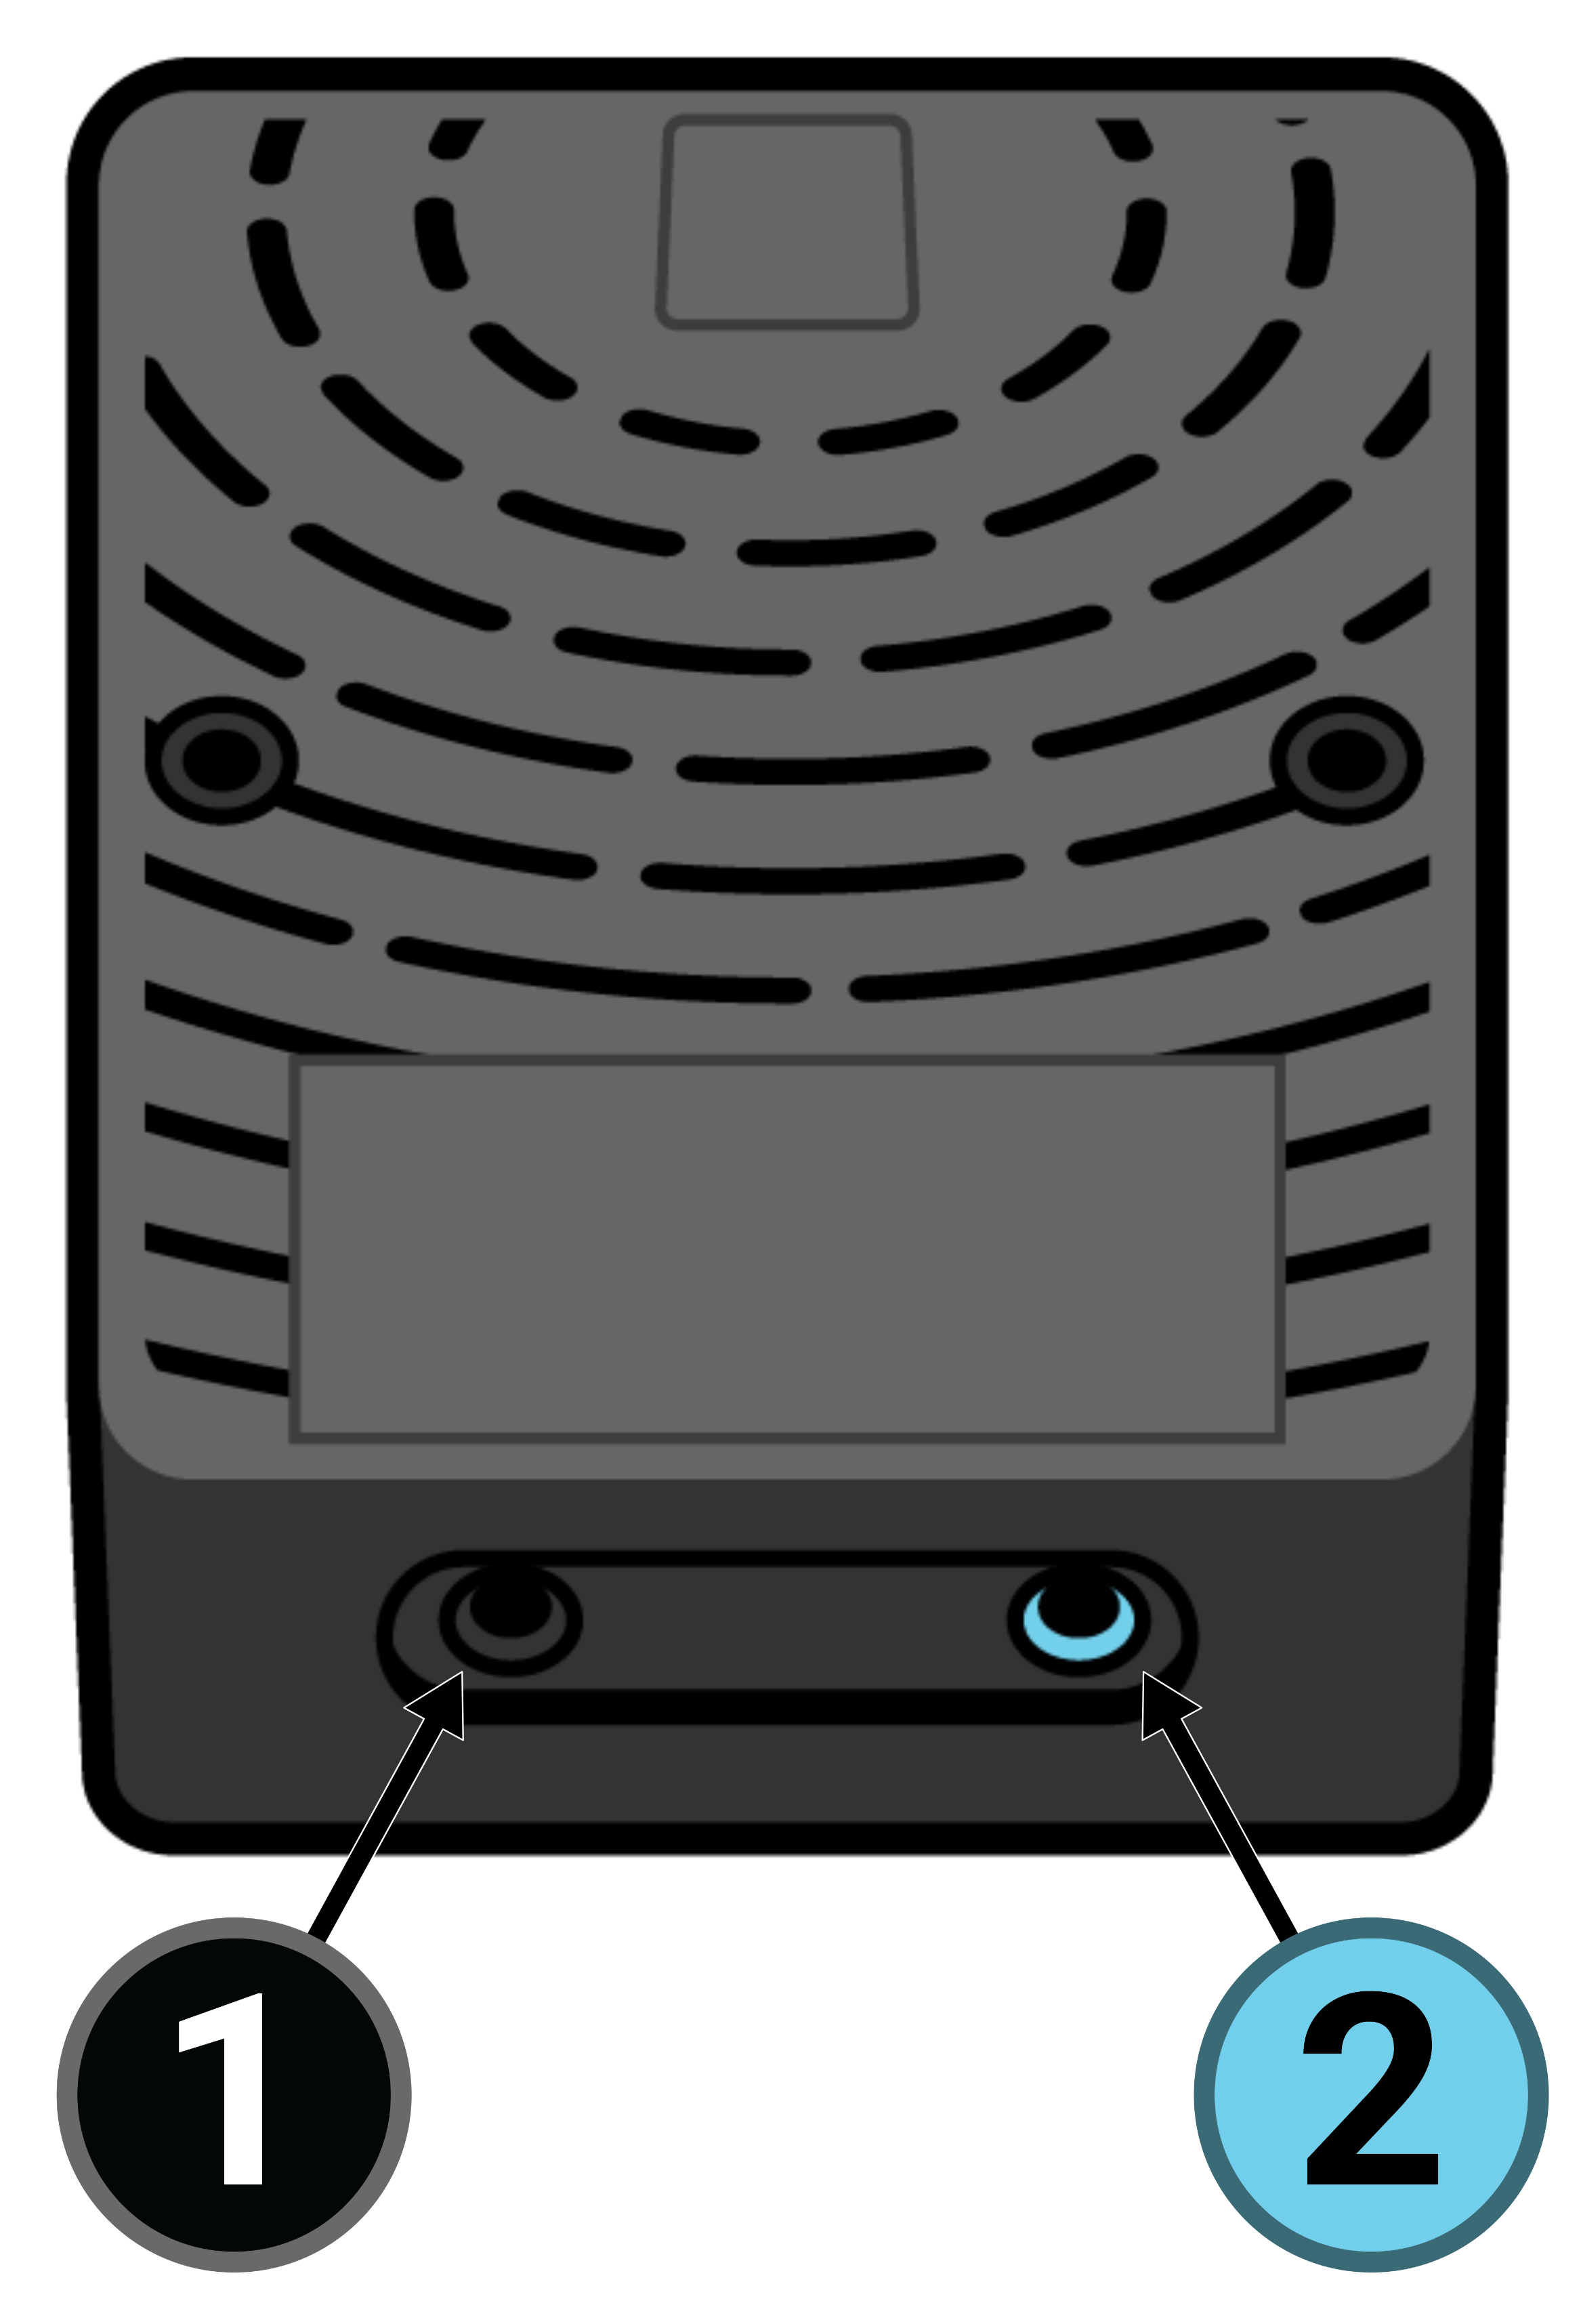
Ensure the sensor plug is firmly inserted into the black sensor port (1) on the processor.
If you have two sensors in total:
Ensure the sensor plug with the black cable (the sensor on the left side of the bed) gets firmly inserted into the black sensor port (1) on the processor, and the sensor plug with the blue cable (the sensor on the right side of the bed) gets firmly inserted into the blue sensor port (2) on the processor. Left vs. right is based on your viewpoint when you're standing at the foot of the bed and facing the head of the bed.
